Wednesday, January 28, 2015

Golden gradient


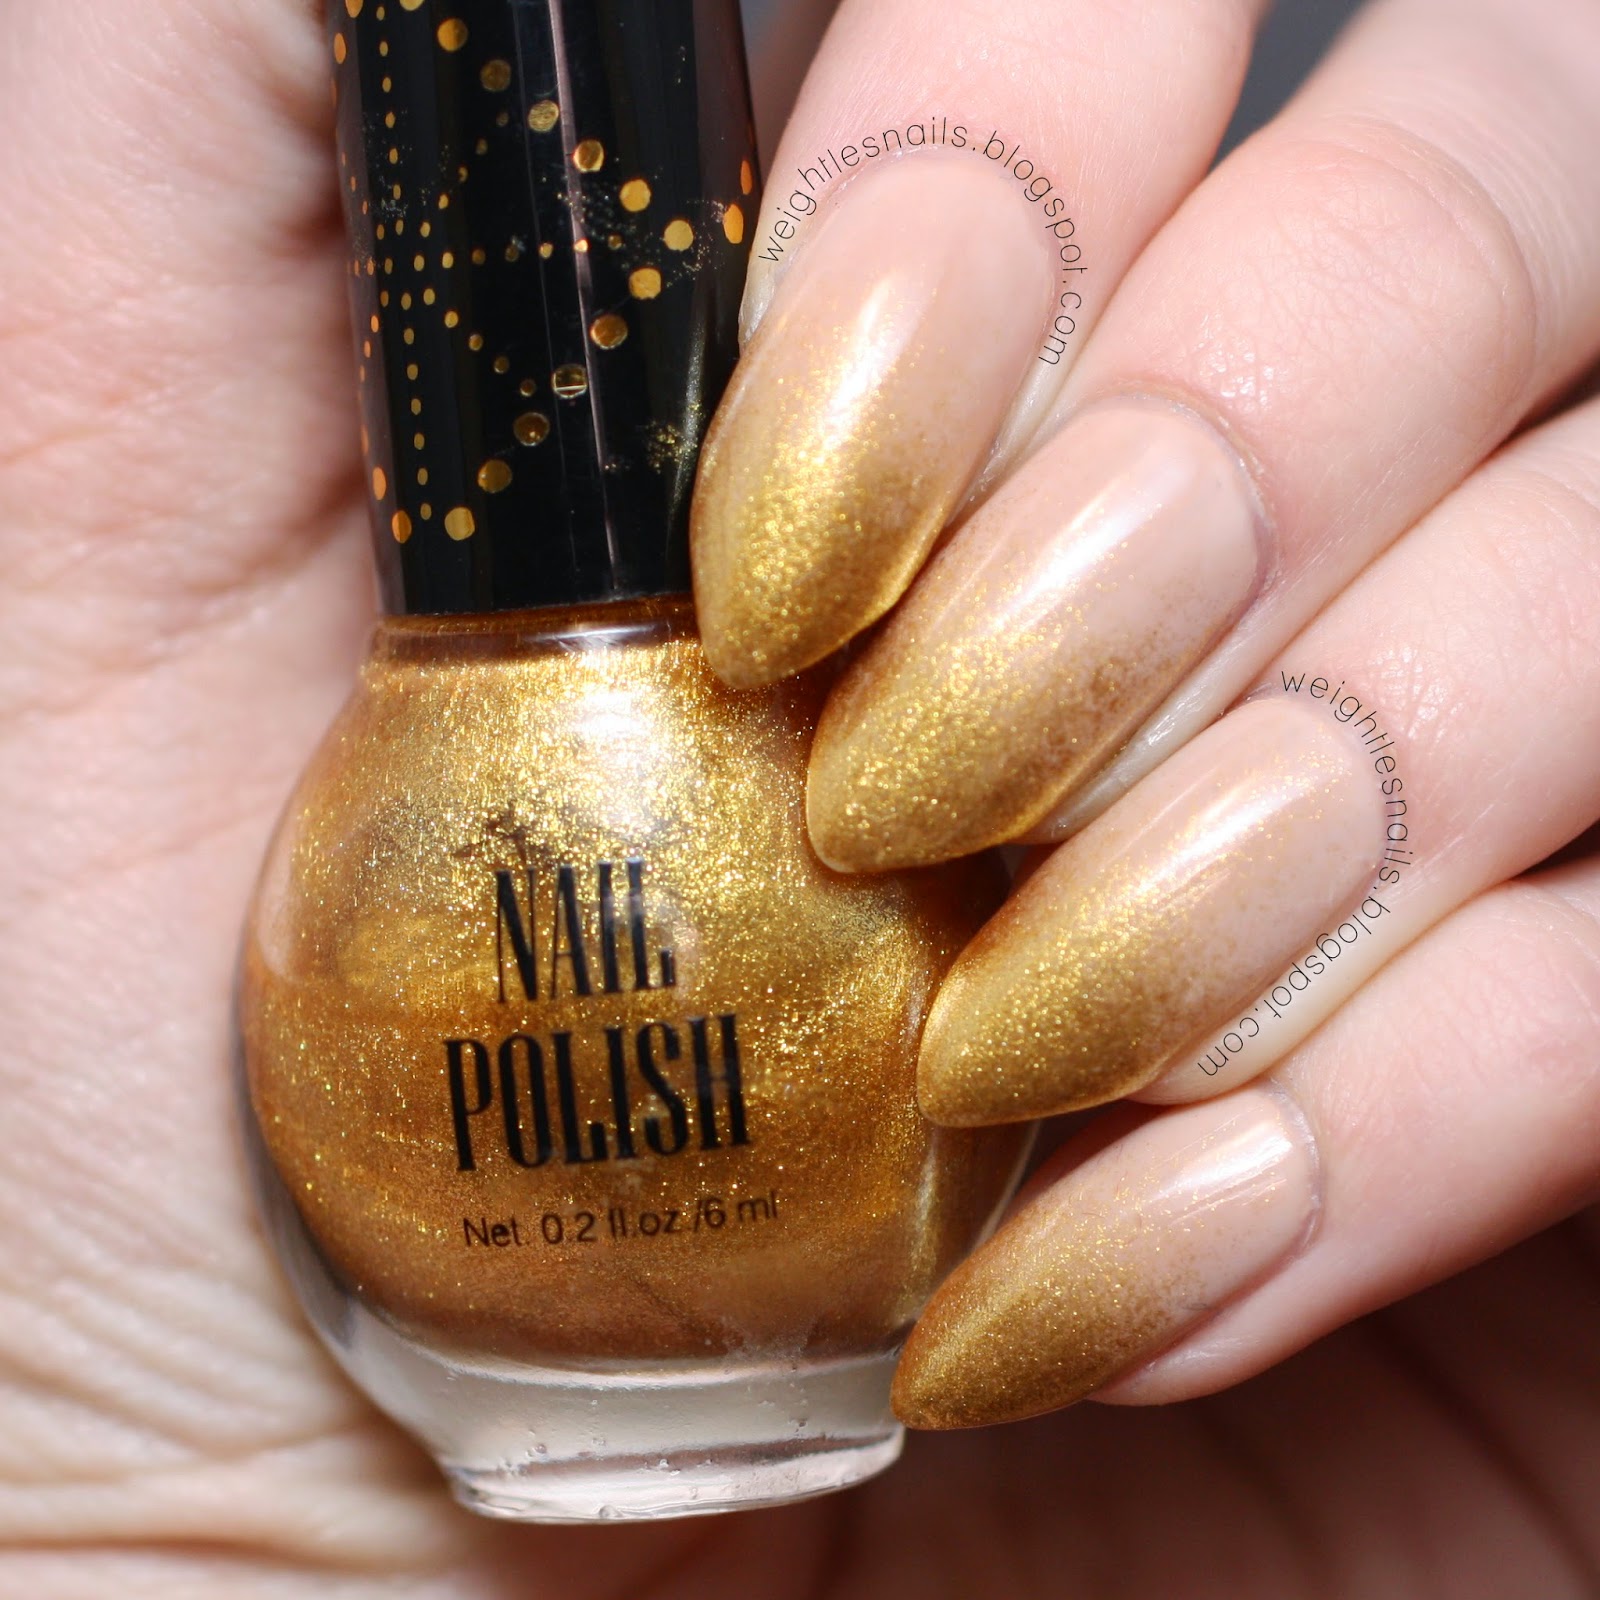
Hello there. Another week of early mornings and school work. I have had anxiety for graduating this year for some time now, like after that life actually begins for real. But it also will be so great and liberating to finally finish high school, so June can't come fast enough now haha. Anyway, today's nails consists of a simple gradient, from nude to gold.


My nails are horribly stained at the moment (but it has started to grow away a bit, yay!) so just going with a base coat and the golden polish, for a really nude shade, wasn't an option. Instead I had to combine two beige polishes that together looks somewhat accurate to my natural colours. I am still looking for the perfect nude nail polish though, so if anyone have any recommendations you are all very welcome to leave them in the comments!

Another thing, is it just me or does anybody else have problems with photographing polishes with much shimmer and a little bit of glitter, just like the one that I am wearing on my tips here? It is so so beautiful when you twist and turn your fingers so that the light reflects from different angles and the shimmer becomes really evident. Unfortunately it is hard to capture that shine in photos without having to make a weird hand pose, lol. Below I have cropped two pictures together so that you can see the difference when the angle is changed, pretty right?


Used polishes
Nordic Cap of Sweden NP02
& other stories Swanskin Beige
H&M Glam Gold


Saturday, January 24, 2015

Important

Hi lovely people. This blog has got some new followers lately so I thought I would take the opportunity to say hello to y'all and welcome to my blog! I love to hear your opinion on anything so comments are always appreciated! 

It's been about a week since my last post, and I haven't done much. School has started for real this week and I have worked my ass off on a essay in civics, about ideologies. Let me tell you that communism is one of the most complicated things I have ever had to try to understand. It is all finished and handed in now though, so we'll see how it goes! Speaking of ideologies, that is also the theme of todays post.


Feminism. Three years ago, I had no idea what that word even meant. But thanks to my wonderful school, my awesome friends and important educative statements all over the internet, I am today very proud to call myself a feminist, and that is a thing that will never change. This is not supposed to be a long rant about why this movement is needed and how important it is, but if you are unsure of what the whole thing actually is about, I encourage you to learn. Learn and stand up for equality for everyone, regardless of the question.


Nail polishes used: (left to right)
OPI Feelin' Hot-Hot-Hot!
Essence Party Princess
H&M Pinks 1 (part of a mini collection)
Collection 2000 Star Dust
China Glaze You Drive Me Coconuts
Snow Flake Nail Polish unnamed


Sunday, January 18, 2015

Ginatricot Blue Bug


I felt like being a little creative, but not too creative if you get me? Something simple and not very time-consuming but still more than just an ordinary polish? So I ended up pulling out an old duochromic polish from Ginatricot, with the suitable name Blue Bug, even though I would call this polish more green than blue. However, it's been a really long time since I used it last time so I thought it was time to bring it out into the spotlight again.


The duochromic effect is pretty dull on the nail, but is far more visible in the bottle, shown above. Gorgeous polish overall and easy to apply, nice opacity with full coverage with two coats. Before I added the lines I quickly sponged on a thin and third layer of the polish, to cover up the brush strokes that were a little too visible for my taste. The lines are done with, surprise, black acrylic paint and a thin striper brush from Bornprettystore.


Friday, January 16, 2015

Tiny Triangles


Just a few days ago, I was casually exploring Instagram and found a totally amazing account - @demelzasworld. She is super talented and I just love all her nail art! Super cute and nice and always stunning colours. I came to this photo and fell so in love, I knew right away that I just had to recreate it! So I grabbed my striping tape and a couple of polishes from OPI that matched the colours of the original, but I chose to go with some different shades, more fitting for autumn. (I have to stop refering to autumn, it is January now?? We've had both Christmas and New Years and there is snow outside, but I still think about the season as autumn...) I just love the reslut so so much that I got carried away a bit with the pictures in this post, but I hope you don't mind, 'cause it actually turned out really pretty!


Anyway, I started off with a white base, here China Glaze White On White and added a quick-drying top coat. When dry, I placed out the striping tape on all four nails (yes, I confess, I only did four of my nails this time, and I still spent more than two hours on them). Using a dotting tool and working two nails, one colour at a time, I randomly filled in the white triangles that were the only thing showing thanks to the tape. When I was finished with the two first nails, I carefully removed the tape and did the other two. Cleaned up and corrected some mistakes with nail polish remover and white polish. All finished off with top coat of course.


Nail polishes used:
China Glaze White On White
OPI Red Lights Ahead ... Where?
OPI Hot & Spicy
OPI Need Sunglasses?
OPI A Grape Fit!
Seche Vite Top Coat


And finally a macro shot just becuase I can. And because I am ridiculously proud of how straight and clean I succeeded with the tape. Taping game growing stronger!


Monday, January 12, 2015

Bump In The Night


Today's nails is a simple swatch of a black texture polish from China Glaze's Halloween 2013 Monsters Ball Collection, and the polish is called Bump In The Night. I prefer glittery when it comes to textured polishes (such as in my new years mani), but this one really speaks to me. When I saw the first swatches of this polish online I knew I had to have it! As usual you can find the whole collection swached over at The Polish Aholic.


Thursday, January 8, 2015

Braided pastels


The braided nail art design is something I've seen countless of times but actually never tried out myself, so I felt that the time had come! It is super simple and no other tools than the ordinary brush that comes with the polish bottle is required. A tip though is to use polishes with high opacity! I chose to use pastels and really love these colours but man were they hard to get to cover each other, and the whole business went kinda messy. Nothing that can't be cleaned up with a bit of nail polish remover though. ;)


This pattern has really grown on me while wearing it, I was a bit skeptical from the beginning and didn't quite like it, but the more time that passed, the more I liked it. Now I love it! It makes my nail shape look 'softer' in some weird way, if that makes any sense? I have to admit that it looks better with a little distant than up-close though.


Nail polishes used:
H&M untitled pink
China Glaze Sun Of A Peach
China Glaze Highlight Of My Summer
HK Girl Glisten & Glow Top Coat


Saturday, January 3, 2015

2015!


Happy new year!! A new year and half way through my last school year, which also marks 50% of this project done. Only one semester until I graduate? Crazy. Anyway, I celebrated the new year with a couple of friends and had a really good time. The nails below are the finished look that I wore during the night but I also wanted to show you how it looked without the colours filled in, 'cause it looked so nice and clean.


So I started with an ordinary black polish as base, and then painted the numbers with acrylic paint and a striper brush and a small nail art brush. When dried and photographed, I filled the white numbers with four different texture polishes with help from the small nail art brush. All finished off with top coat!


Used nail polishes:
Nordic Cap of Sweden NP12
(pointer to pinkie)
Guppy 14
OPI Get Your Number
Kicks Rose Quartz
Unknown brand bought in Thailand but the polish name is Rainbow
Seche Vite top coat